UPDATE 01.03.2012: Please see Updated Installation Guide
In our first blog post we describe in detail how to install Marker.to. Before you can start highlighting the web, you need to install Marker.to browser extension for Chrome, Firefox or Safari browser.
If you use Internet Explorer or other browser then you could try out Chrome or Firefox or wait for our IE release.
NB! Highlighted pages can be viewed with any major browser.
If you open website www.marker.to you should notice a big green install button.
Click on the Install button 
Please select your browser type for detailed instructions:
Chrome
Firefox
Safari
Google Chrome
Click on Install button and you will go to
https://chrome.google.com/webstore/detail/lnmengjdnfjbochkdkcjbbpildacancp
You will see this screen in Chrome Webstore:
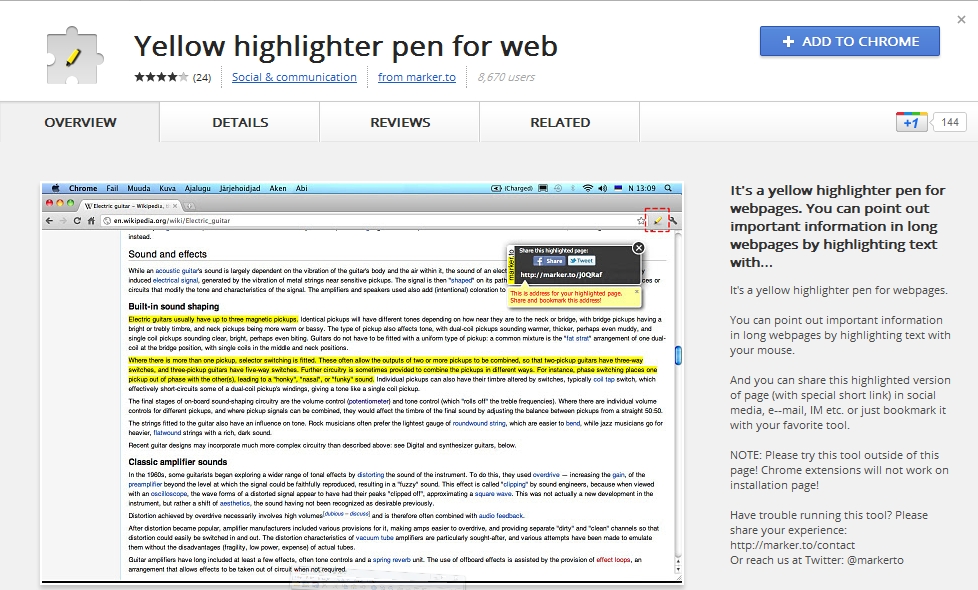
Now click on the blue button „Add to Chrome“(in the right upper corner). Next you will see this pop-up screen:
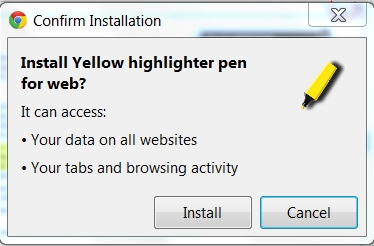
Click ‘Install’.
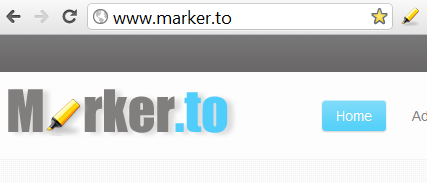
Congrats, you’ve installed Marker! A little yellow pen icon appeared in the right corner, just next to address bar. Click on the icon to run Marker.
Mozilla Firefox
Click Install button on marker.to page and plugin installation will start from
http://www.marker.to/firefoxPlugin/markerto.xpi
And you will see following dialog:
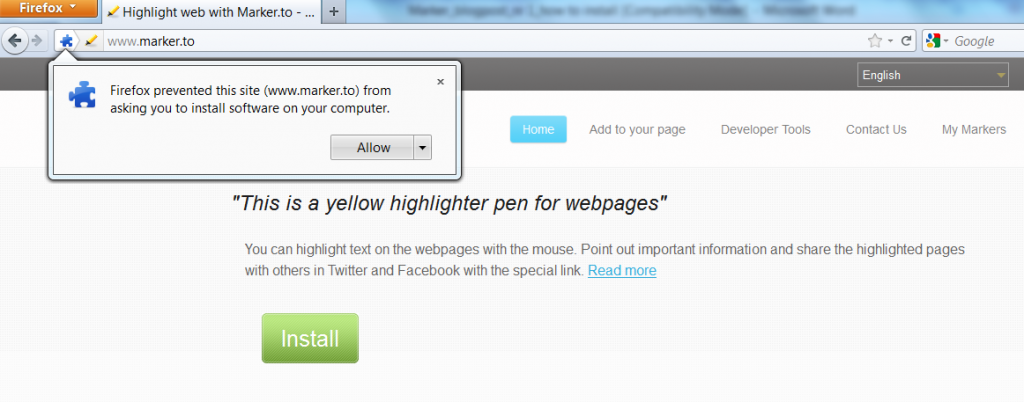
Click on ’Allow’.
Now two windows pop-up. Click ’Install Now’. It’s ok – Marker.to will not harm your computer!
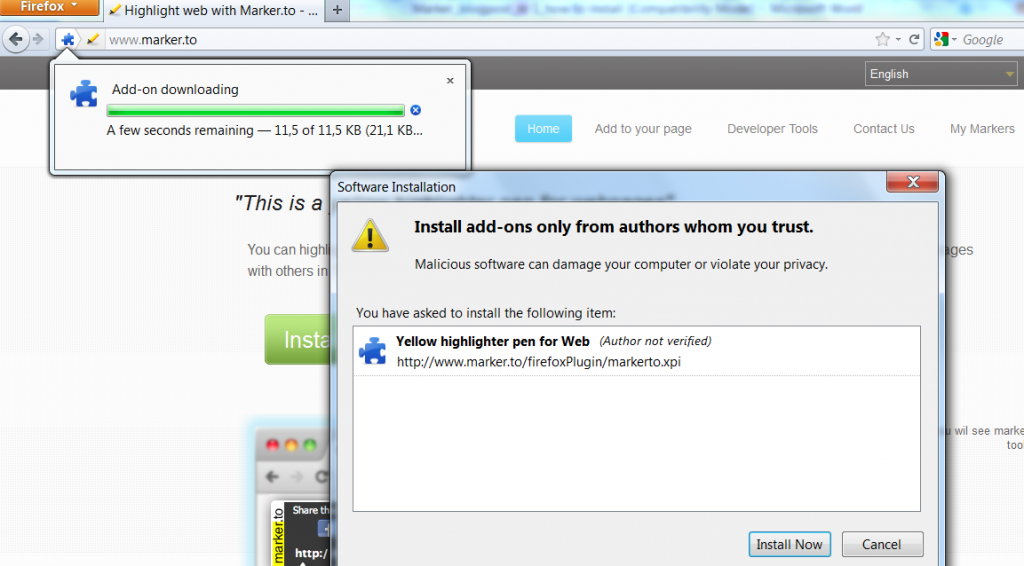
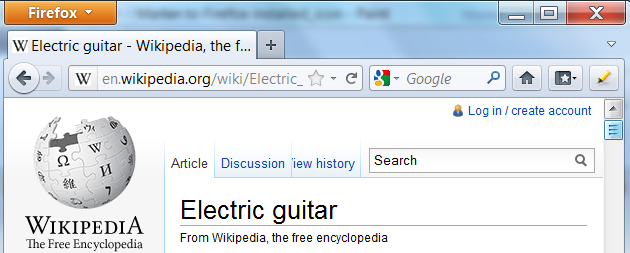
Congrats! Marker.to is installed for Firefox. You can find the icon of Marker.to on right side, next to the address bar.
Safari
Click Install button from marker.to page and download will start from:
http://marker.to/safariPlugin/safariext.safariextz
You will see this screen after clicking Install button:
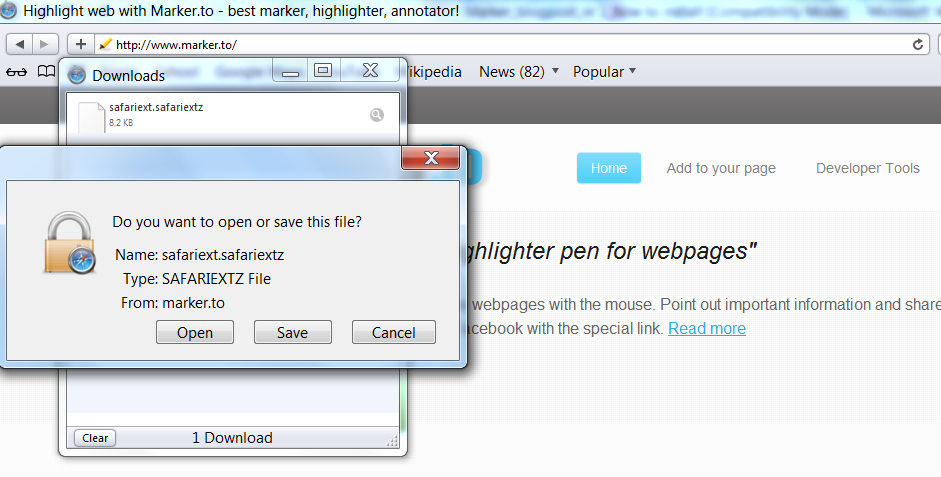
Click ‘Open’. Another pop-up window opens.
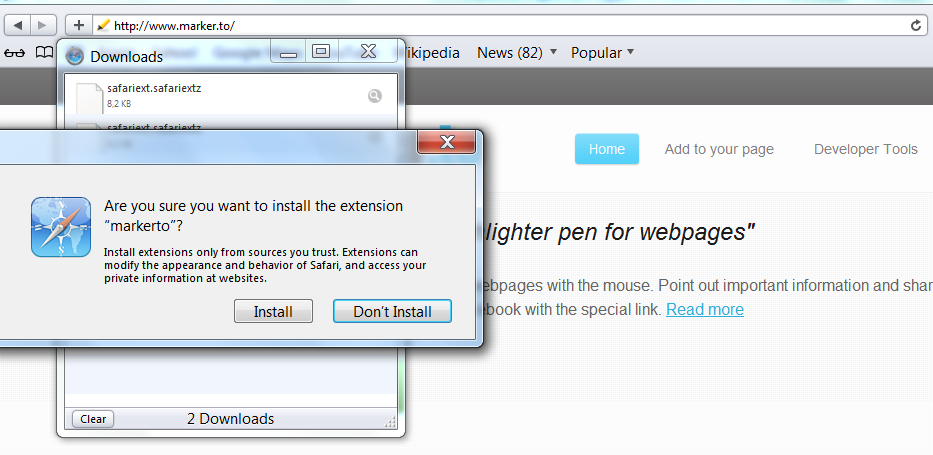
Click ’Install’. Marker.to is installed if you can locate a little grey pen icon on the left corner, just next to the address bar. Click on the icon to run Marker.

In the next blog post we will describe how to highlihght with Marker.to.

![]() – click on it to highlight selected text and start highlighting and sharing tool.
– click on it to highlight selected text and start highlighting and sharing tool.


